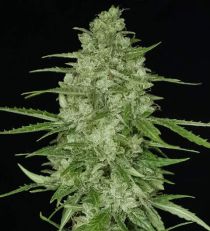
 Auto Girl Scout Cookies - 5 Seeds By 420 SeedbankFrom: US$48.26
- THC: 19%-22%
- Yield: 500-600gr/m²
- Flowering Time: 6-8 Weeks
Sale2-FOR-1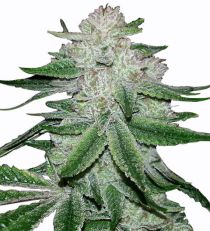 Gorilla Glue Auto - 5 Seeds By 420 SeedbankFrom: US$50.80
- THC: Over 22%
- Yield: 500-600gr/m²
- Flowering Time: 6-8 Weeks
Sale2-FOR-1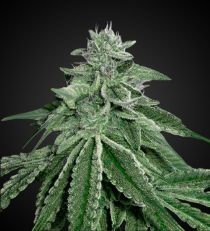 Blue Dream Auto - 5 Seeds By 420 SeedbankFrom: US$48.26
- THC: 15%-18%
- Yield: 300-400gr/m²
- Flowering Time: 8-10 Weeks
Sale2-FOR-1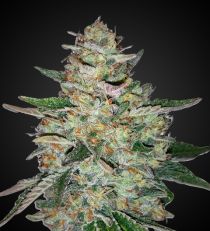 Big Bud Automatic - 5 Seeds By 420 SeedbankFrom: US$48.26
- THC: 10%-14%
- Yield: 300-400gr/m²
- Flowering Time: 8-10 Weeks
Sale2-FOR-1 Granddaddy Purple Autoflower - Auto Seeds By Auto SeedsFrom: Now US$22.39 Was US$29.85
- THC: 20%-24%
- Yield: 300-400gr/m²
- Flowering Time: 8-10 Weeks
Sale25% OFF Zkittlez Autoflower - Auto Seeds By Auto SeedsFrom: Now US$22.39 Was US$29.85
- THC: 20%-24%
- Yield: 400-500gr/m²
- Flowering Time: 8-10 Weeks
Sale25% OFF Runtz Autoflower - Auto Seeds By Auto SeedsFrom: Now US$22.39 Was US$29.85
- THC: 20%-24%
- Yield: 400-500gr/m²
- Flowering Time: 6-8 Weeks
Sale25% OFF Permanent Marker Autoflower - Auto Seeds By Auto SeedsFrom: Now US$26.67 Was US$35.56
- THC: Over 25%
- Yield: 400-500gr/m²
- Flowering Time: 8-10 Weeks
Sale25% OFF Bruce Banner Autoflower - Auto Seeds By Auto SeedsFrom: Now US$26.67 Was US$35.56
- THC: Over 25%
- Yield: 500-600gr/m²
- Flowering Time: 10-12 Weeks
Sale25% OFF Gelato Autoflower - Auto Seeds By Auto SeedsFrom: Now US$22.39 Was US$29.85
- THC: 20%-24%
- Yield: 400-500gr/m²
- Flowering Time: 8-10 Weeks
Sale25% OFF Mango Cookies Autoflower - Auto Seeds By Auto SeedsFrom: Now US$22.39 Was US$29.85
- THC: 19%-22%
- Yield: 300-400gr/m²
- Flowering Time: 6-8 Weeks
Sale25% OFF Do Si Dos Autoflower - Auto Seeds By Auto SeedsFrom: Now US$22.39 Was US$29.85
- THC: Over 25%
- Yield: 500-600gr/m²
- Flowering Time: 8-10 Weeks
Sale25% OFF Godfather OG Autoflower - Auto Seeds By Auto SeedsFrom: Now US$26.67 Was US$35.56
- THC: Over 25%
- Yield: 400-500gr/m²
- Flowering Time: 10-12 Weeks
Sale25% OFF Moonrocks Autoflower - Auto Seeds By Auto SeedsFrom: Now US$26.67 Was US$35.56
- THC: Over 25%
- Yield: 400-500gr/m²
- Flowering Time: 6-8 Weeks
Sale25% OFF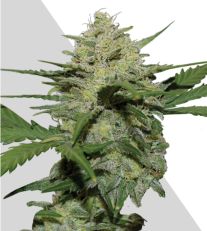 Girl Scout Cookies - Auto Seeds By Auto SeedsFrom: Now US$20.00 Was US$26.67
- THC: Over 22%
- Yield: 500-600gr/m²
- Flowering Time: 6-8 Weeks
Sale25% OFF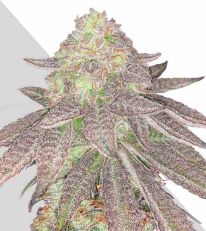 Rainbow Glue Auto - Auto Seeds By Auto SeedsFrom: Now US$20.49 Was US$27.31
- THC: 18%-20%
- Yield: 400-500gr/m²
- Flowering Time: 6-8 Weeks
Sale25% OFF Acapulco Gold Auto - Auto Seeds By Auto SeedsFrom: Now US$20.49 Was US$27.31
- THC: 18%-20%
- Yield: 400-500gr/m²
- Flowering Time: 6-8 Weeks
Sale25% OFF Pink Runtz Auto - Auto Seeds By Auto SeedsFrom: Now US$24.77 Was US$33.02
- THC: 18%-20%
- Yield: 550-650gr/m²
- Flowering Time: 6-8 Weeks
Sale25% OFF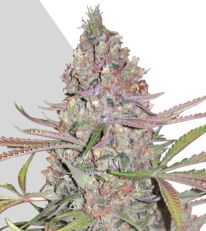 Berry Ryder - Auto Seeds By Auto SeedsFrom: Now US$20.00 Was US$26.67
- THC: 10%-14%
- Yield: 300-400gr/m²
- Flowering Time: 6-8 Weeks
Sale25% OFF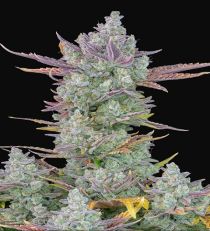 Gorilla Cookies Auto by Fast Buds By Fast BudsFrom: US$40.64
- THC: Over 25%
- Yield: 500-600gr/m²
- Flowering Time: 6-8 Weeks
 Purple Lemonade by Fast Buds Seeds By Fast BudsFrom: US$62.23
- THC: 19%-22%
- Yield: 400-500gr/m²
- Flowering Time: 8-10 Weeks
 Gelato Auto by Fast Buds Seeds By Fast BudsFrom: US$40.64
- THC: Over 22%
- Yield: 500-600gr/m²
- Flowering Time: 6-8 Weeks
 Gorilla Glue Auto by Fast Buds Seeds By Fast BudsFrom: US$40.64
- THC: Over 22%
- Yield: 500-600gr/m²
- Flowering Time: 10-12 Weeks
 Gorilla Zkittlez Auto - Barney's Farm By Barneys FarmFrom: US$40.01
- THC: 18%-20%
- Yield: 450-550gr/m²
- Flowering Time: 6-8 Weeks
Sale25% OFF
AUTOFLOWER CANNABIS SEEDS
Autoflowering cannabis seeds have revolutionized home growing, offering a fast and simple way to cultivate high-quality cannabis without worrying about changing light cycles. Unlike traditional photoperiod strains that require a shift in lighting schedules to start flowering, autoflower strains begin blooming automatically after a set period—typically between 55 to 95 days from germination.
Read MoreThe Benefits Of Growing Autoflowering Seeds
These fast-growing, low-maintenance strains owe their unique characteristics to their Cannabis ruderalis genetics, which evolved in regions with extreme climates and long daylight hours. Thanks to selective breeding, modern autoflowers boast high THC levels, potent effects, and impressive yields, making them a fantastic option for beginners and experienced growers alike.
Autoflowering cannabis offers several key benefits that set them apart from photoperiod strains:
- Fast Harvests: Most autoflowers are ready for harvest within 8-12 weeks from seed, allowing for multiple harvests per year.
- Beginner-Friendly: These hardy plants require minimal maintenance, making them ideal for new growers.
- Compact Size: Perfect for discreet growing in small spaces like grow tents, balconies, or guerrilla grow spots.
- Resistant to Pests & Mold: Thanks to their ruderalis lineage, autoflowers are naturally tough and adaptable.
- No Light Schedule Changes: Unlike photoperiod plants, autos don’t rely on darkness to bloom, allowing for simple indoor and outdoor cultivation.
- High-Quality Buds: Modern breeding techniques have made autoflowers just as potent and flavorful as their photoperiod counterparts.
How Much Do Autoflowering Plants Yield?
Autoflower yields depend on factors like strain genetics, growing conditions, and grower experience. On average:
- Indoor yields: 28-120g per plant (depending on pot size)
- Outdoor yields: When grown outdoors autoflowers can produce bigger yields, this is because without a pot their root growth is unrestricted.
For the best results, choose a high-yielding autoflower strain like Auto Pounder, which is known for its huge harvests.
Beginners Guide To Growing Autoflowers
How To Germinate Autoflower Seeds
Autoflowers thrive when given the right start. Here’s a simple germination method to set you off on the right tracks:
- Place a moist paper towel on a plate.
- Spread seeds an inch apart on the towel.
- Cover with another moist paper towel and seal with a second plate.
- Keep in a warm, dark place (21-26°C with 60-70% humidity).
- Check daily and add water if needed. Within 72 hours, a taproot should emerge.
Once germinated, carefully transfer your seedlings to their final growing medium.
How To Plant Autoflower Seeds After Germination
Choose the Right Pot Size: Since autos don’t like transplanting, plant them directly into their final container.
- Indoor grows: 3-5 gallon (11-19L) pots
- Outdoor grows: 5-10 gallon (20-40L) pots
Prepare the Soil: Use light, airy soil with good drainage. Autoflowers do best in a super soil mix containing:
- Perlite (for aeration and drainage)
- Coco Coir (for moisture retention)
- Peat Moss (for water retention and slow nutrient release)
Planting: Create a 1-inch hole, place the seed taproot-down, and cover it gently with soil.
How To Get Your Autoflowers Growing After Planting
Once your autoflower seeds are planted, the first few weeks are crucial for establishing healthy growth. Proper watering, environment, and care will set your plants up for success.
Watering Autoflower Seedlings:
- First few days: Lightly mist the soil to keep it moist but not soaked—avoid drenching the seedling.
- First week: Water around the seedling, not directly on it, using a spray bottle or a small stream to prevent root disturbance.
- General rule: Water only when the top inch of soil feels dry to avoid overwatering, which can lead to damping-off and root rot.
Taking Care Of Young Autoflower Plants:
- Avoid overhandling – Autoflower seedlings are delicate; disturbing them can cause stress and stunted growth.
- Gentle airflow – Use a small fan on low to strengthen stems, but don’t blast them with direct wind.
- No nutrients yet – Autoflowers don’t need feeding for the first 10-14 days, as they rely on nutrients stored in the seed.
What to Expect in the First 2 Weeks:
- Days 1-4: The seedling emerges with its first small leaves (cotyledons).
- Days 5-10: True leaves start growing, and roots develop rapidly—keep humidity around 60-70% for best results.
- Days 10-14: Growth speeds up, and the plant enters the vegetative stage—this is when you can start light feeding if needed.
Keeping the Environment Stable:
- Temperature: Maintain 70-80°F (21-27°C) to encourage strong growth.
- Humidity: 60-70% RH for seedlings, reducing gradually as they grow.
- Lighting: 18/6 or 20/4 light cycle with full-spectrum LEDs at a safe distance to prevent light stress.
Light Cycles For Autoflowers
Unlike photoperiod strains, autoflowers don’t rely on specific light schedules to trigger flowering, giving growers flexibility in their lighting choices. Here are the most common light cycles used for autoflowering plants:
18/6 Light Cycle (18 hours light / 6 hours dark): The most widely used schedule, striking a balance between energy efficiency and strong plant growth. It provides enough light for development while allowing plants a short recovery period.
20/4 Light Cycle (20 hours light / 4 hours dark): a 20 lights on and 4 lights off cycle is a popular option for growers looking to push growth slightly further while still giving plants a short rest period to reduce stress.
24/0 Light Cycle (24 hours light / 0 hours dark): Some growers opt for continuous light to maximize photosynthesis, but this does increase the potential for stress so is best avoided unless you have experienc growing autoflowers.
5 Key Tips To Increase Autoflower Yield
- Maximize Light Exposure – Use full-spectrum LEDs indoors (600-900 µmol/m²/s) or ensure 10-12 hours of direct sunlight outdoors, keeping lights at the right distance to prevent stretching or burn.
- Utilize Low-Stress Training (LST) – Gently bend and secure branches to improve light penetration and airflow, avoiding high-stress techniques like topping due to autoflowers' short veg phase but you can lightly defoliate your plants.
- Feed Properly & Avoid Overfeeding – Start with ¼ to ½ strength nutrients, use 10-7-5 NPK in veg and 5-10-10 in flower, and supplement with CalMag to prevent deficiencies.
- Improve Root Health & Drainage – Grow in 3-5 gallon fabric pots with light, well-aerated soil or coco coir, and avoid overwatering by letting the top 1-2 inches dry out before rewatering.
- Maintain Optimal Climate – Keep temperatures at 70-80°F (21-27°C) and humidity at 60-70% in veg, 40-50% in flower, with good airflow to prevent mold and bud rot.
Nutrients For Autoflowers
Nutrients are essential for healthy growth for cannabis plants, and NPK refers to the three primary macronutrients: Nitrogen (N), Phosphorus (P), and Potassium (K). Nitrogen supports leaf and stem growth, phosphorus aids in root development and flower production, and potassium strengthens overall plant health.
Autoflowers require a lighter feeding schedule than photoperiod strains, because they are much smaller in size and therefore are more sensitive to overfeeding. Most nutrient brands will give measurements of NPK dosage on the package, this is often for photoperiods so you will need to adjust the nutrients for your autoflower plants as shown in the table below:
Here is an example of a feeding schedule adjusted specifically for autoflowering plants.
|
Week |
Growth Stage |
Recommended NPK Ratio |
Dose Relative To Photoperiods |
|
1 |
Seedling stage |
Just pH adjusted water |
No nutrients |
|
2 |
Late Seedling stage |
2-1-2 |
1/8 dose |
|
3 |
Vegetative Stage |
10-5-5 |
1/4 dose |
|
4 |
Vegetative Stage |
10-5-5 |
1/2 dose |
|
5 |
Early Flowering Stage |
5-10-10 |
1/2 dose |
|
6 |
Flowering Stage |
5-15-10 |
1/2 dose |
|
7 |
Flowering Stage |
5-15-10 |
1/2 dose |
|
8 |
Flowering Stage |
5-15-10 |
1/2 dose |
|
9 |
Flowering Stage |
5-15-10 |
1/2 dose |
|
10 |
Harvesting Stage |
Flush with pH adjusted water |
No nutrients |
When To Harvest Your Autoflowers
There is a two-week window when the buds on your autoflowers will be at their ideal ripeness and ready for harvest, so it is important to start assessing the appearance and color of the trichomes from the latter part of the flowering stage. You will need to use a magnifying tool such as a jeweler’s loupe to make this assessment. Here is a guide for what to look out for:
- 0-30% of the trichomes are clear or glassy – Too Early – Transparent trichomes indicate immature buds with low potency and lacking aroma and flavor.
- 50-70% of trichomes are Milky/Cloudy – Peak THC – Clear and glassy looking trichomes signal maximum potency, delivering a strong, euphoric, and psychoactive high. This is when most people prefer to harvest their plants.
- 20-40% of trichomes are amber colored – More Sedative – As THC degrades into CBN, buds produce a relaxing, body-heavy effect, ideal for pain relief and sleep.
How To Cut Down Your Autoflower Plants
- Harvest: Cut the plant at the base and hang upside down in a dark, ventilated space (18°C, 45% humidity).
- Dry: For 10-14 days, ensuring buds are crisp on the outside.
- Cure: Store in glass jars, burping them daily for the first 2 weeks, then weekly for 1-2 months to enhance flavor and potency.
Advanced Tips for Growing Autoflowers Indoors
- Optimize Lighting – Use full-spectrum LED grow lights, keep PPFD levels at 600-900 µmol/m²/s, and follow an 18/6 or 20/4 light cycle for the best growth.
- Control Temperature & Humidity – Maintain 70-80°F (21-27°C) daytime, 65°F (18°C) minimum at night, and lower humidity from 60-70% (seedling) to 40-50% (flowering) to prevent mold.
- Dial in CO₂ for Faster Growth – If using high-powered LEDs (PPFD 800+), supplement with CO₂ at 1200-1500 ppm to enhance photosynthesis and boost yields. Ensure proper ventilation to avoid CO₂ buildup.
- Fine-Tune Nutrient Delivery – Autoflower plants prefer a mild but consistent feeding schedule; use low EC (electrical conductivity) levels, gradually increasing from EC 0.8 in early veg to 1.4 in mid-flower for optimal uptake.
- Maximize Canopy with Advanced LST – Instead of basic LST, use strategic tie-downs, SCROG (Screen of Green), or mainlining (if done early) to create an even canopy, improving light penetration and increasing yield per square foot.
Advanced Tips for Growing Autoflowers Outdoors
- Optimize Sunlight Exposure with Microclimates – Choose south-facing spots with 10-12 hours of direct sunlight, but also consider heat reflection from walls or greenhouse setups to extend warmth in cooler seasons.
- Enhance Soil for Maximum Growth – Use light, well-aerated super soil with added mycorrhizal fungi and beneficial microbes to boost root efficiency, improve nutrient uptake, and enhance plant resilience.
- Master Watering & Drainage – Adjust watering based on climate: in hot regions, use mulch and drip irrigation to retain moisture, while in rain-prone areas, plant in raised beds or fabric pots to prevent root rot.
- Implement Natural Pest & Weather Protection – Use companion planting (marigolds, basil, and garlic) for pest control, set up row covers or netting for protection, and apply organic foliar sprays (neem oil or silica) to strengthen leaves against stress.
- Plan a Continuous Harvest Cycle – Stagger plantings every 4-6 weeks for multiple harvests per season, and in warmer climates, experiment with early spring and late autumn plantings using cold frames or temporary covers for extended growing periods.
How potent are autoflowers?
Autoflowers have significantly increased in potency over the years. Traditionally, they had THC levels around 10-15%, but recent advancements in selective breeding have led to autoflowering strains that can reach up to 26% THC.
Are all autoflower seeds feminized?
All of our autoflowers at 420 Seeds are feminized, ensuring they grow into bud-producing female plants. While it is possible to find regular autoflower seeds, they are less common and not as popular due to the higher likelihood of male plants that don't produce buds.
What is the best way to store autoflower seeds at home?
Autoflower seeds should be stored in an airtight container, placed in a cool, dark, and dry area away from temperature fluctuations. This environment keeps them fresh for longer ensuring their viability. If you plan to store them for longer than six months, it's best to keep them in a refrigerator at 6°C - 8°C.
Best Sellers
-
 Jack Herer Feminized by Sensi SeedsFrom: US$68.08
- THC: 15%-18%
- Yield: 500-600gr/m²
- Flowering Time: 12-14 Weeks
-
 Mamba Negra CBG by BlimburnFrom: Now US$40.96 Was US$54.61
- THC: Less than 1%
- Yield: 200-300gr/m²
- Flowering Time: 8-10 Weeks
Sale25% OFF -
 Zombie Death Fuck Strain by BlimburnFrom: Now US$34.29 Was US$45.72
- THC: 20%-24%
- Yield: 300-400gr/m²
- Flowering Time: 8-10 Weeks
Sale25% OFF -
 Tijuana Strain by BlimburnFrom: Now US$29.53 Was US$39.37
- THC: 19%-22%
- Yield: 400-500gr/m²
- Flowering Time: 8-10 Weeks
Sale25% OFF -
 Nikki & Swami’s Taängie by BlimburnFrom: Now US$60.01 Was US$80.01
- THC: 19%-22%
- Yield: 450-550gr/m²
- Flowering Time: 8-10 Weeks
Sale25% OFF -
 Kyle’s Sweet Island Strain by BlimburnFrom: Now US$60.01 Was US$80.01
- THC: 18%-20%
- Yield: 500-600gr/m²
- Flowering Time: 8-10 Weeks
Sale25% OFF -
 Stoned Panda Strain by BlimburnFrom: Now US$34.29 Was US$45.72
- THC: 25%+
- Yield: 500-700gr/m²
- Flowering Time: 10-12 Weeks
Sale25% OFF -
 Kyle’s Skywalker OG Seeds by BlimburnFrom: Now US$60.01 Was US$80.01
- THC: 20%-24%
- Yield: 500-600gr/m²
- Flowering Time: 8-10 Weeks
Sale25% OFF -
 Silver Surfer Haze by BlimburnFrom: Now US$29.53 Was US$39.37
- THC: 20%-24%
- Yield: 500-700gr/m²
- Flowering Time: 10-12 Weeks
Sale25% OFF -
 Scrambler Haze Strain by BlimburnFrom: Now US$34.29 Was US$45.72
- THC: 25%+
- Yield: Over 600gr/m²
- Flowering Time: 10-12 Weeks
Sale25% OFF -
 Original Clon Strain by BlimburnFrom: Now US$39.05 Was US$52.07
- THC: 18%-20%
- Yield: 450-550gr/m²
- Flowering Time: 6-8 Weeks
Sale25% OFF